> ## Documentation Index
> Fetch the complete documentation index at: https://docs.isotopes.ai/llms.txt
> Use this file to discover all available pages before exploring further.
# Postgres Connector
The Postgres connector lets aidnn pull data directly from your PostgreSQL database for analysis. Setup runs entirely in aidnn.
## 1. Add the Postgres connector in aidnn
### Open the Connectors page
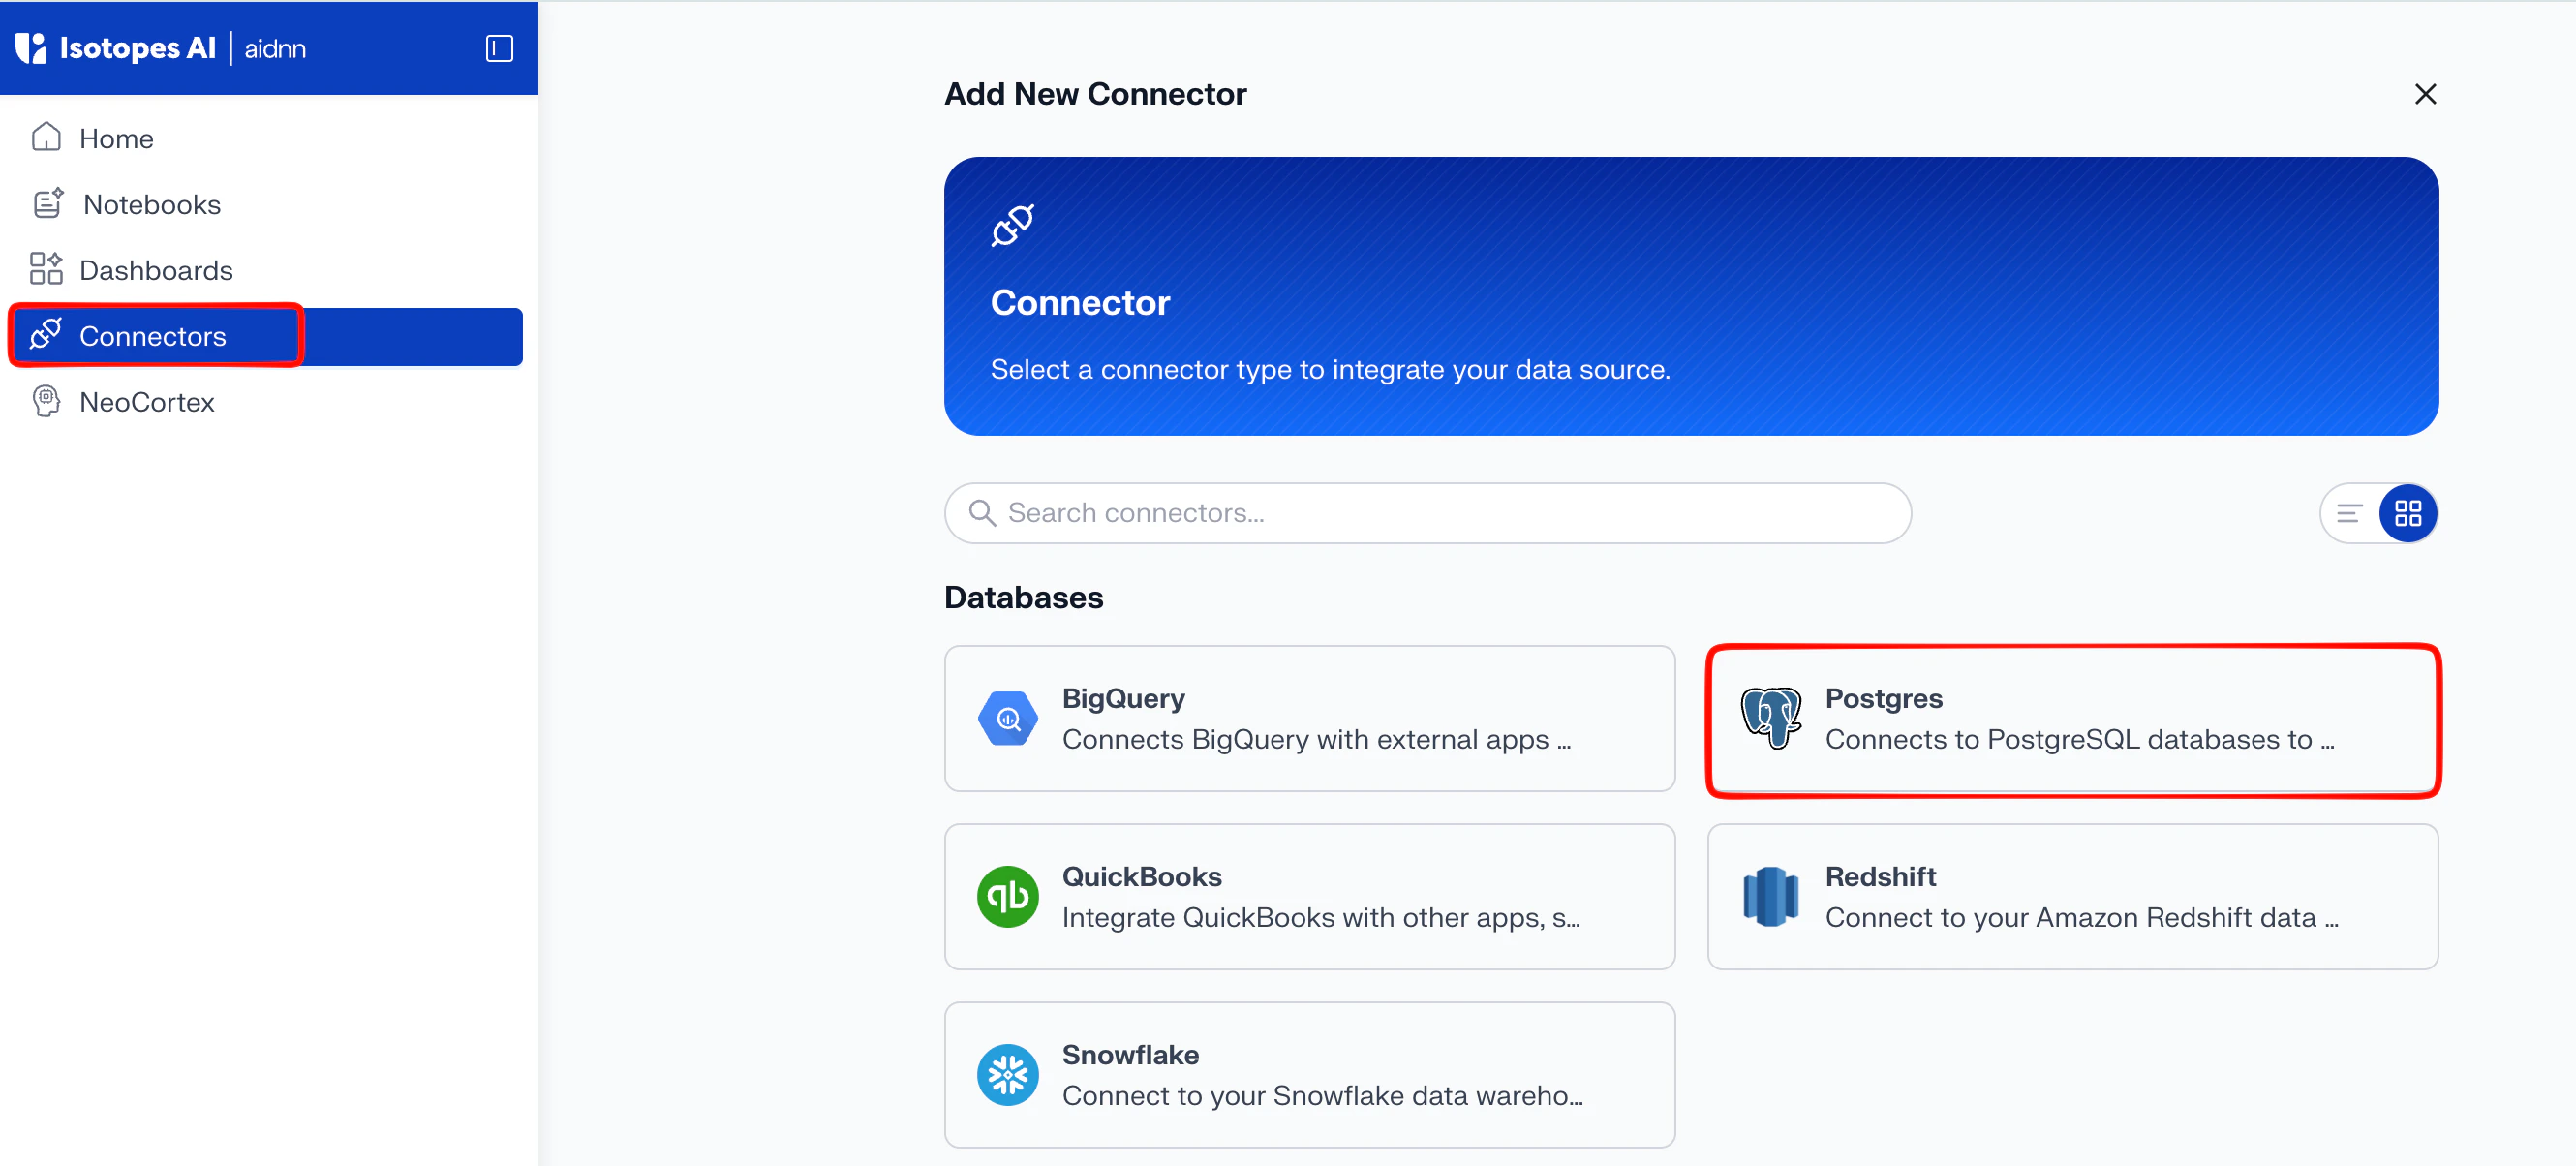
From the aidnn home screen, click **Connectors** in the left sidebar.
### Start a new connector
Click **Add New Connector** in the top-right corner. You’ll see a grid of every available connector grouped by category.
### Pick Postgres
Under **Databases**, select **Postgres**. This opens the **Add New Postgres Service** page.
 ### 2. Fill in the connector details
The Add New Postgres Service form has two parts: identification (name, description, visibility) and connection details (host, port, credentials, database).
### Allowlist aidnn’s IPs first
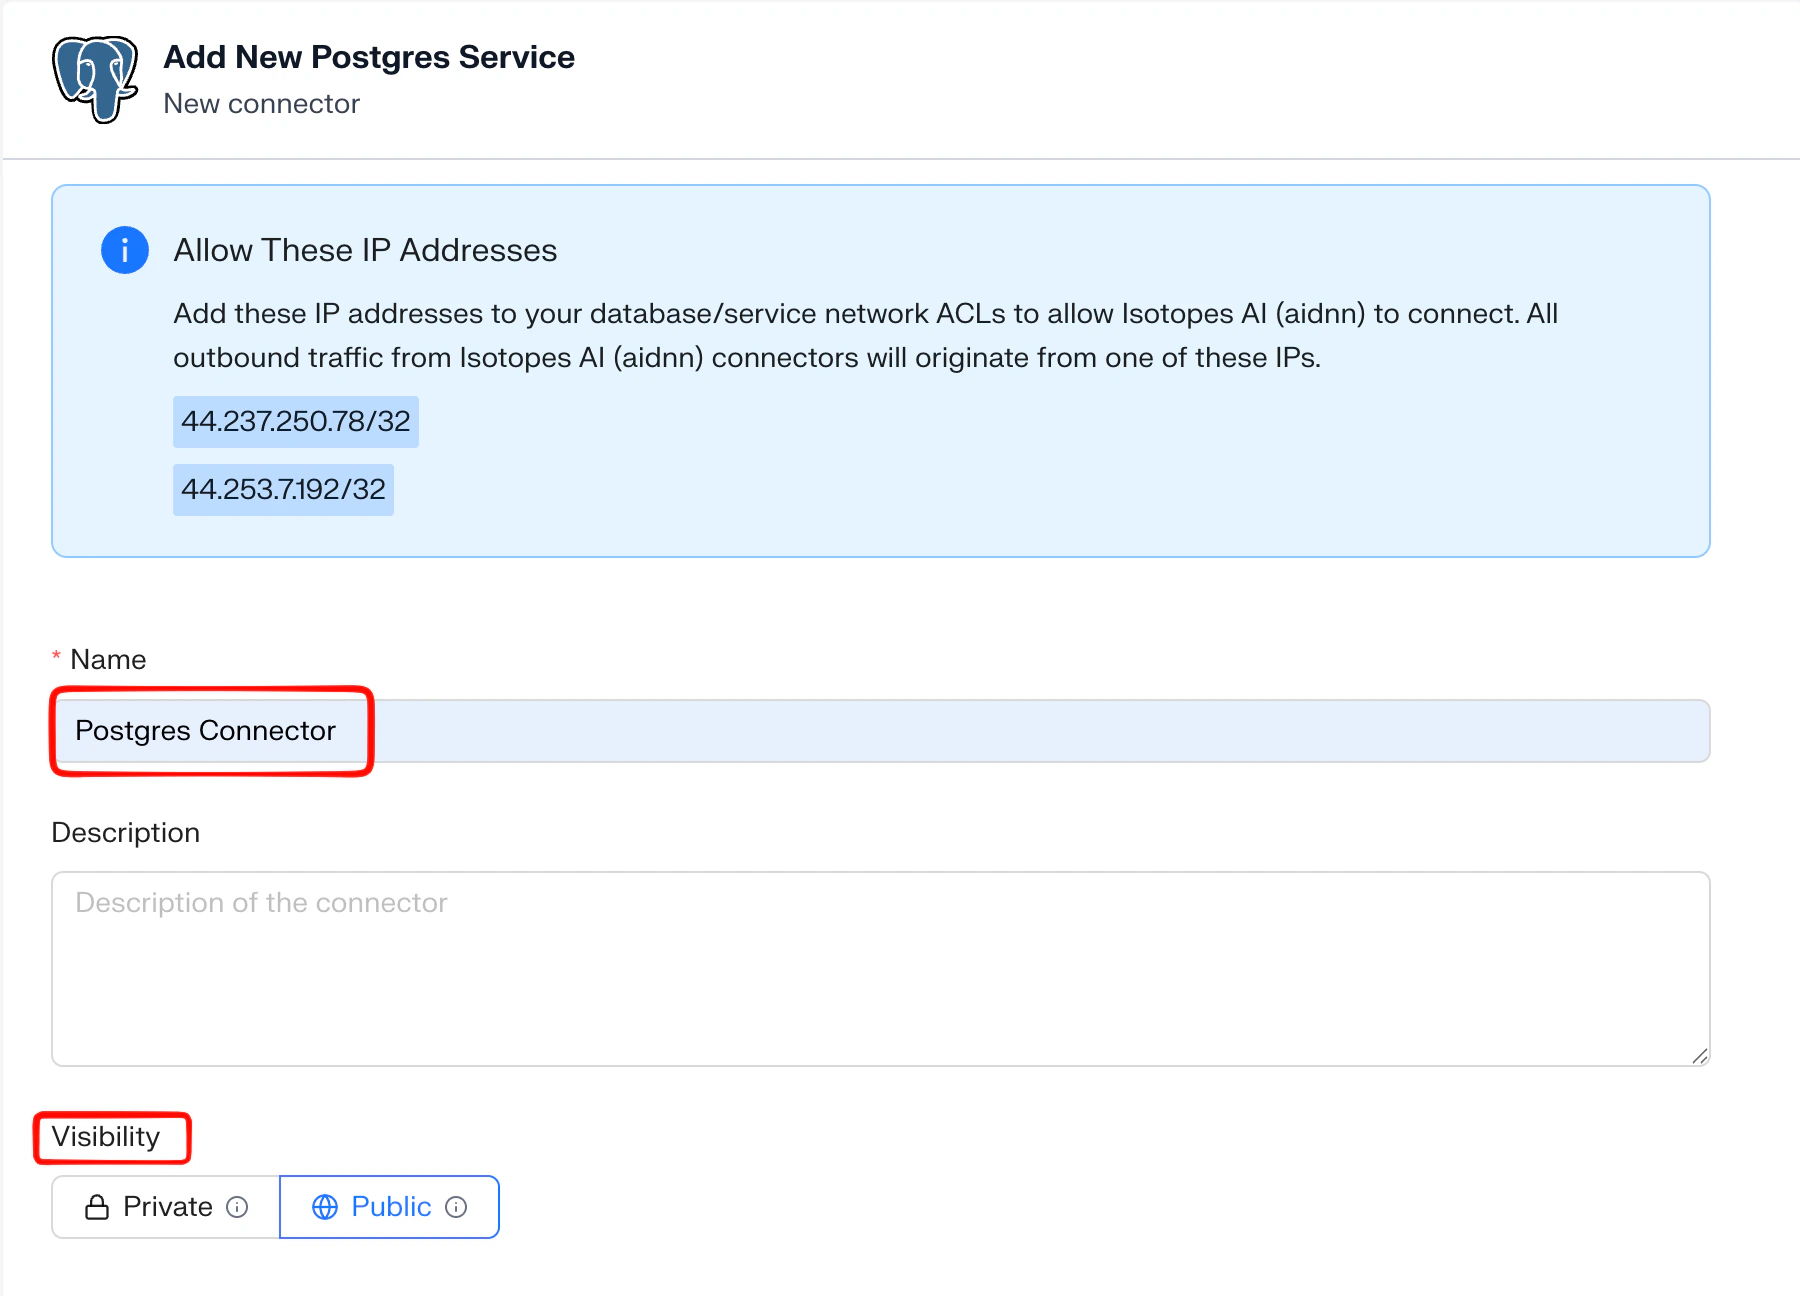
At the top of the form, aidnn lists the outbound IP addresses its connectors use. Add these to your database’s network ACL or firewall rules before you go any further — the test connection step won’t pass without them.
### 2. Fill in the connector details
The Add New Postgres Service form has two parts: identification (name, description, visibility) and connection details (host, port, credentials, database).
### Allowlist aidnn’s IPs first
At the top of the form, aidnn lists the outbound IP addresses its connectors use. Add these to your database’s network ACL or firewall rules before you go any further — the test connection step won’t pass without them.
 ### Name the service
* **Name** - a clear name (for example, "Postgres Connector" or "Prod Postgres – Analytics").
* **Description** - optional, useful when you connect multiple Postgres databases.
* **Visibility** - Public (everyone in your org can use it) or Private (only you).
### Enter connection details
Scroll down and fill in the standard PostgreSQL connection fields:
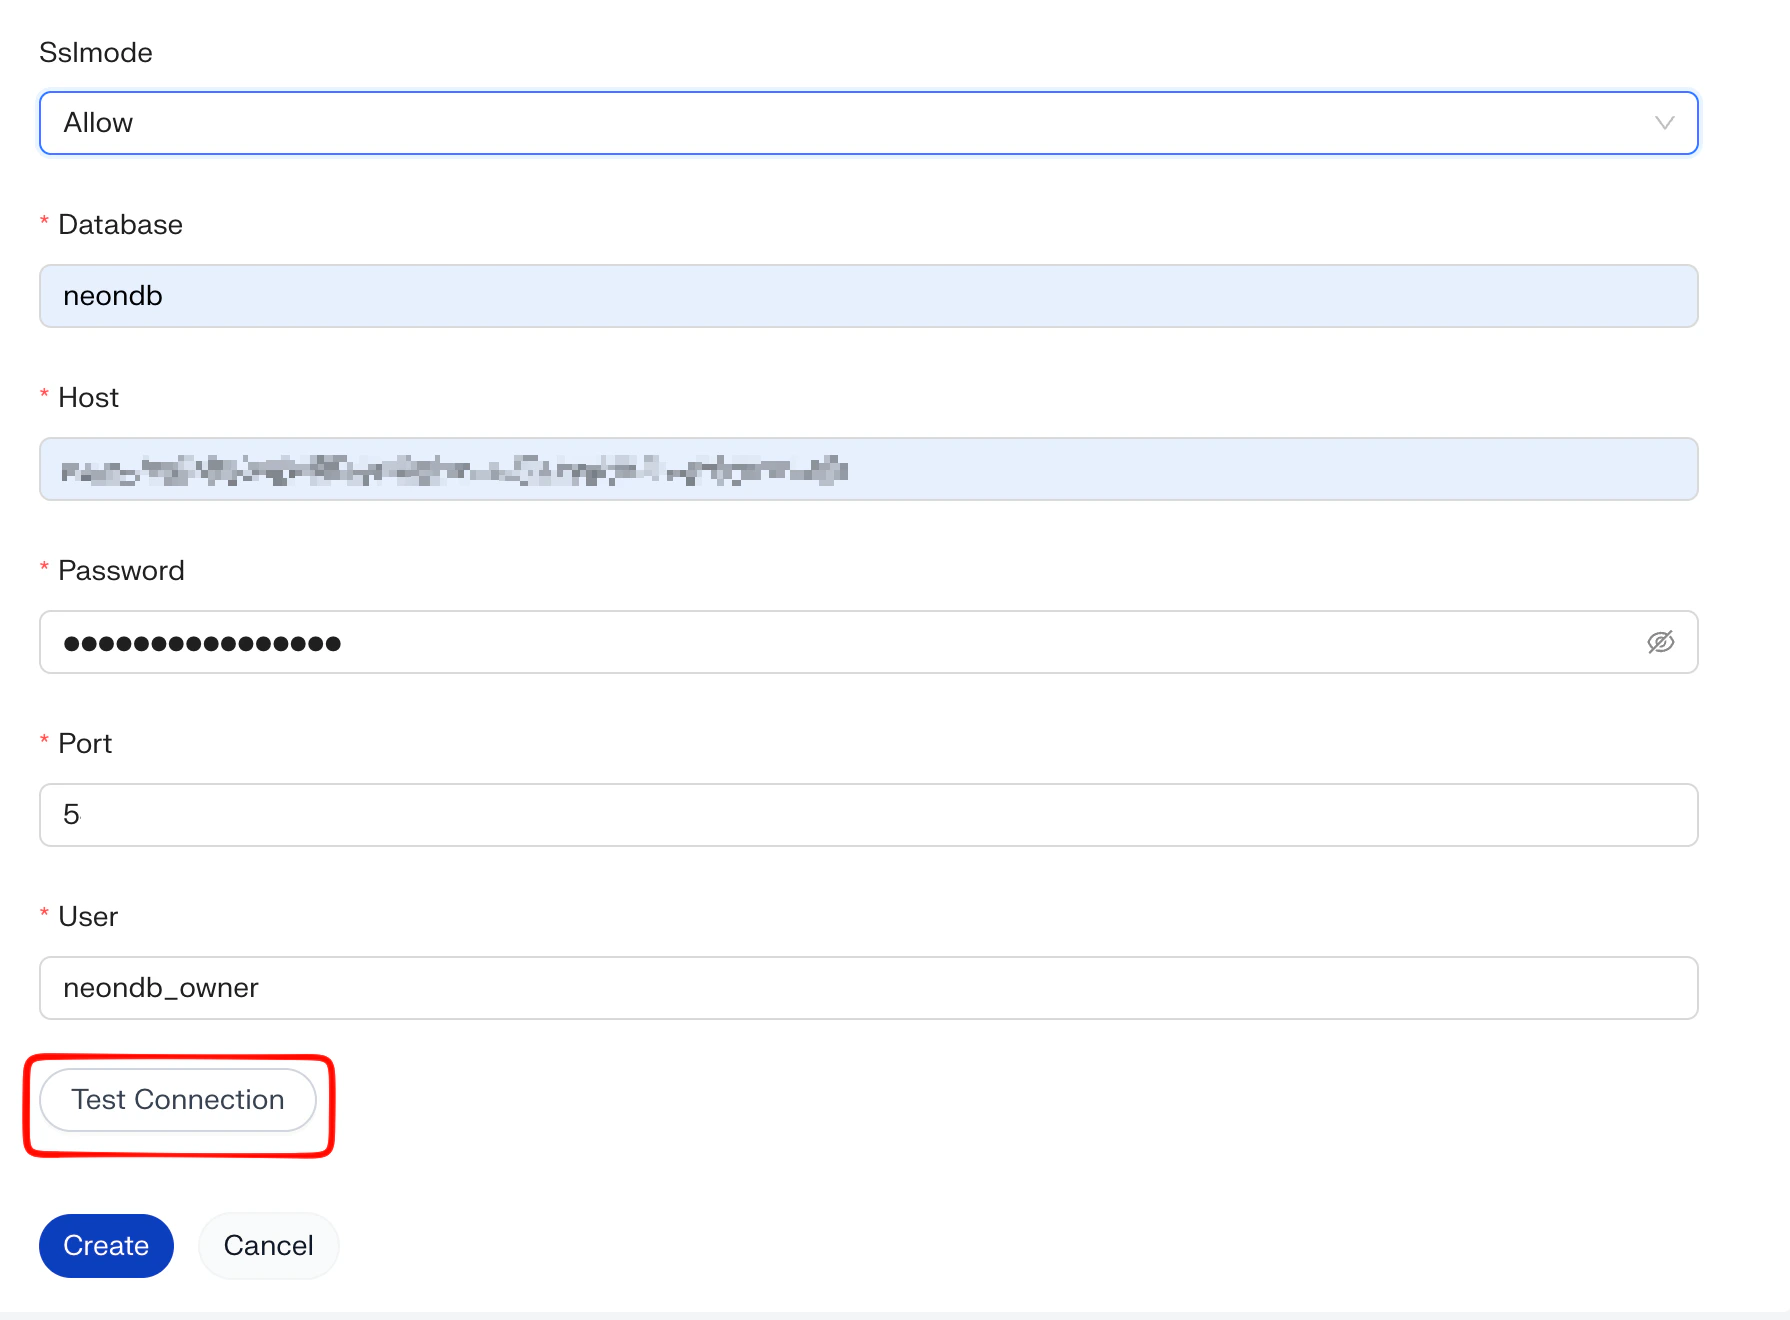
* **SslMode** - typically Allow or Require, depending on how your database accepts TLS.
* **Database** - the database name (for example, neondb)
* **Host** - the database hostname or endpoint.
* **Password** - the password for the user below.
* **Port** - the database port (Postgres defaults to 5432).
* **User** - the database user aidnn should connect as. Read access is enough.
### Name the service
* **Name** - a clear name (for example, "Postgres Connector" or "Prod Postgres – Analytics").
* **Description** - optional, useful when you connect multiple Postgres databases.
* **Visibility** - Public (everyone in your org can use it) or Private (only you).
### Enter connection details
Scroll down and fill in the standard PostgreSQL connection fields:
* **SslMode** - typically Allow or Require, depending on how your database accepts TLS.
* **Database** - the database name (for example, neondb)
* **Host** - the database hostname or endpoint.
* **Password** - the password for the user below.
* **Port** - the database port (Postgres defaults to 5432).
* **User** - the database user aidnn should connect as. Read access is enough.
 ## 3. Test the connection
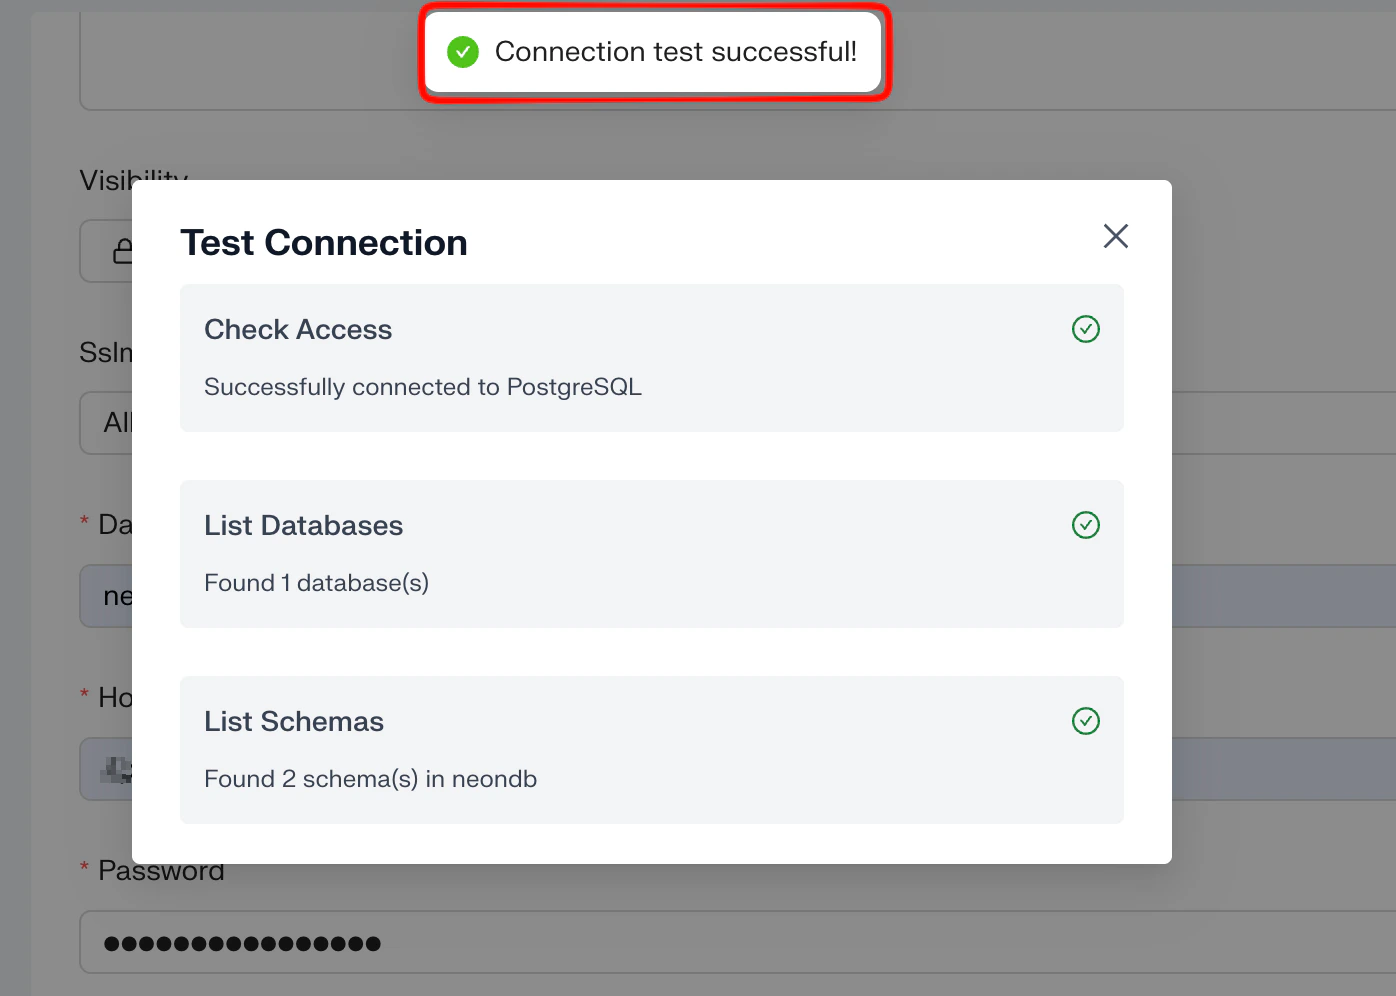
Click **Test Connection**. aidnn runs three checks: it confirms it can reach the database (Check Access), lists the databases it can see, and lists the schemas inside the database you specified. If everything passes, you'll see a *Connection test successful!* confirmation.
## 3. Test the connection
Click **Test Connection**. aidnn runs three checks: it confirms it can reach the database (Check Access), lists the databases it can see, and lists the schemas inside the database you specified. If everything passes, you'll see a *Connection test successful!* confirmation.
 ### Create the connector
Once the test passes, click **Create** at the bottom of the form. aidnn saves the connector and takes you to its detail page.
## 4. Sync metadata
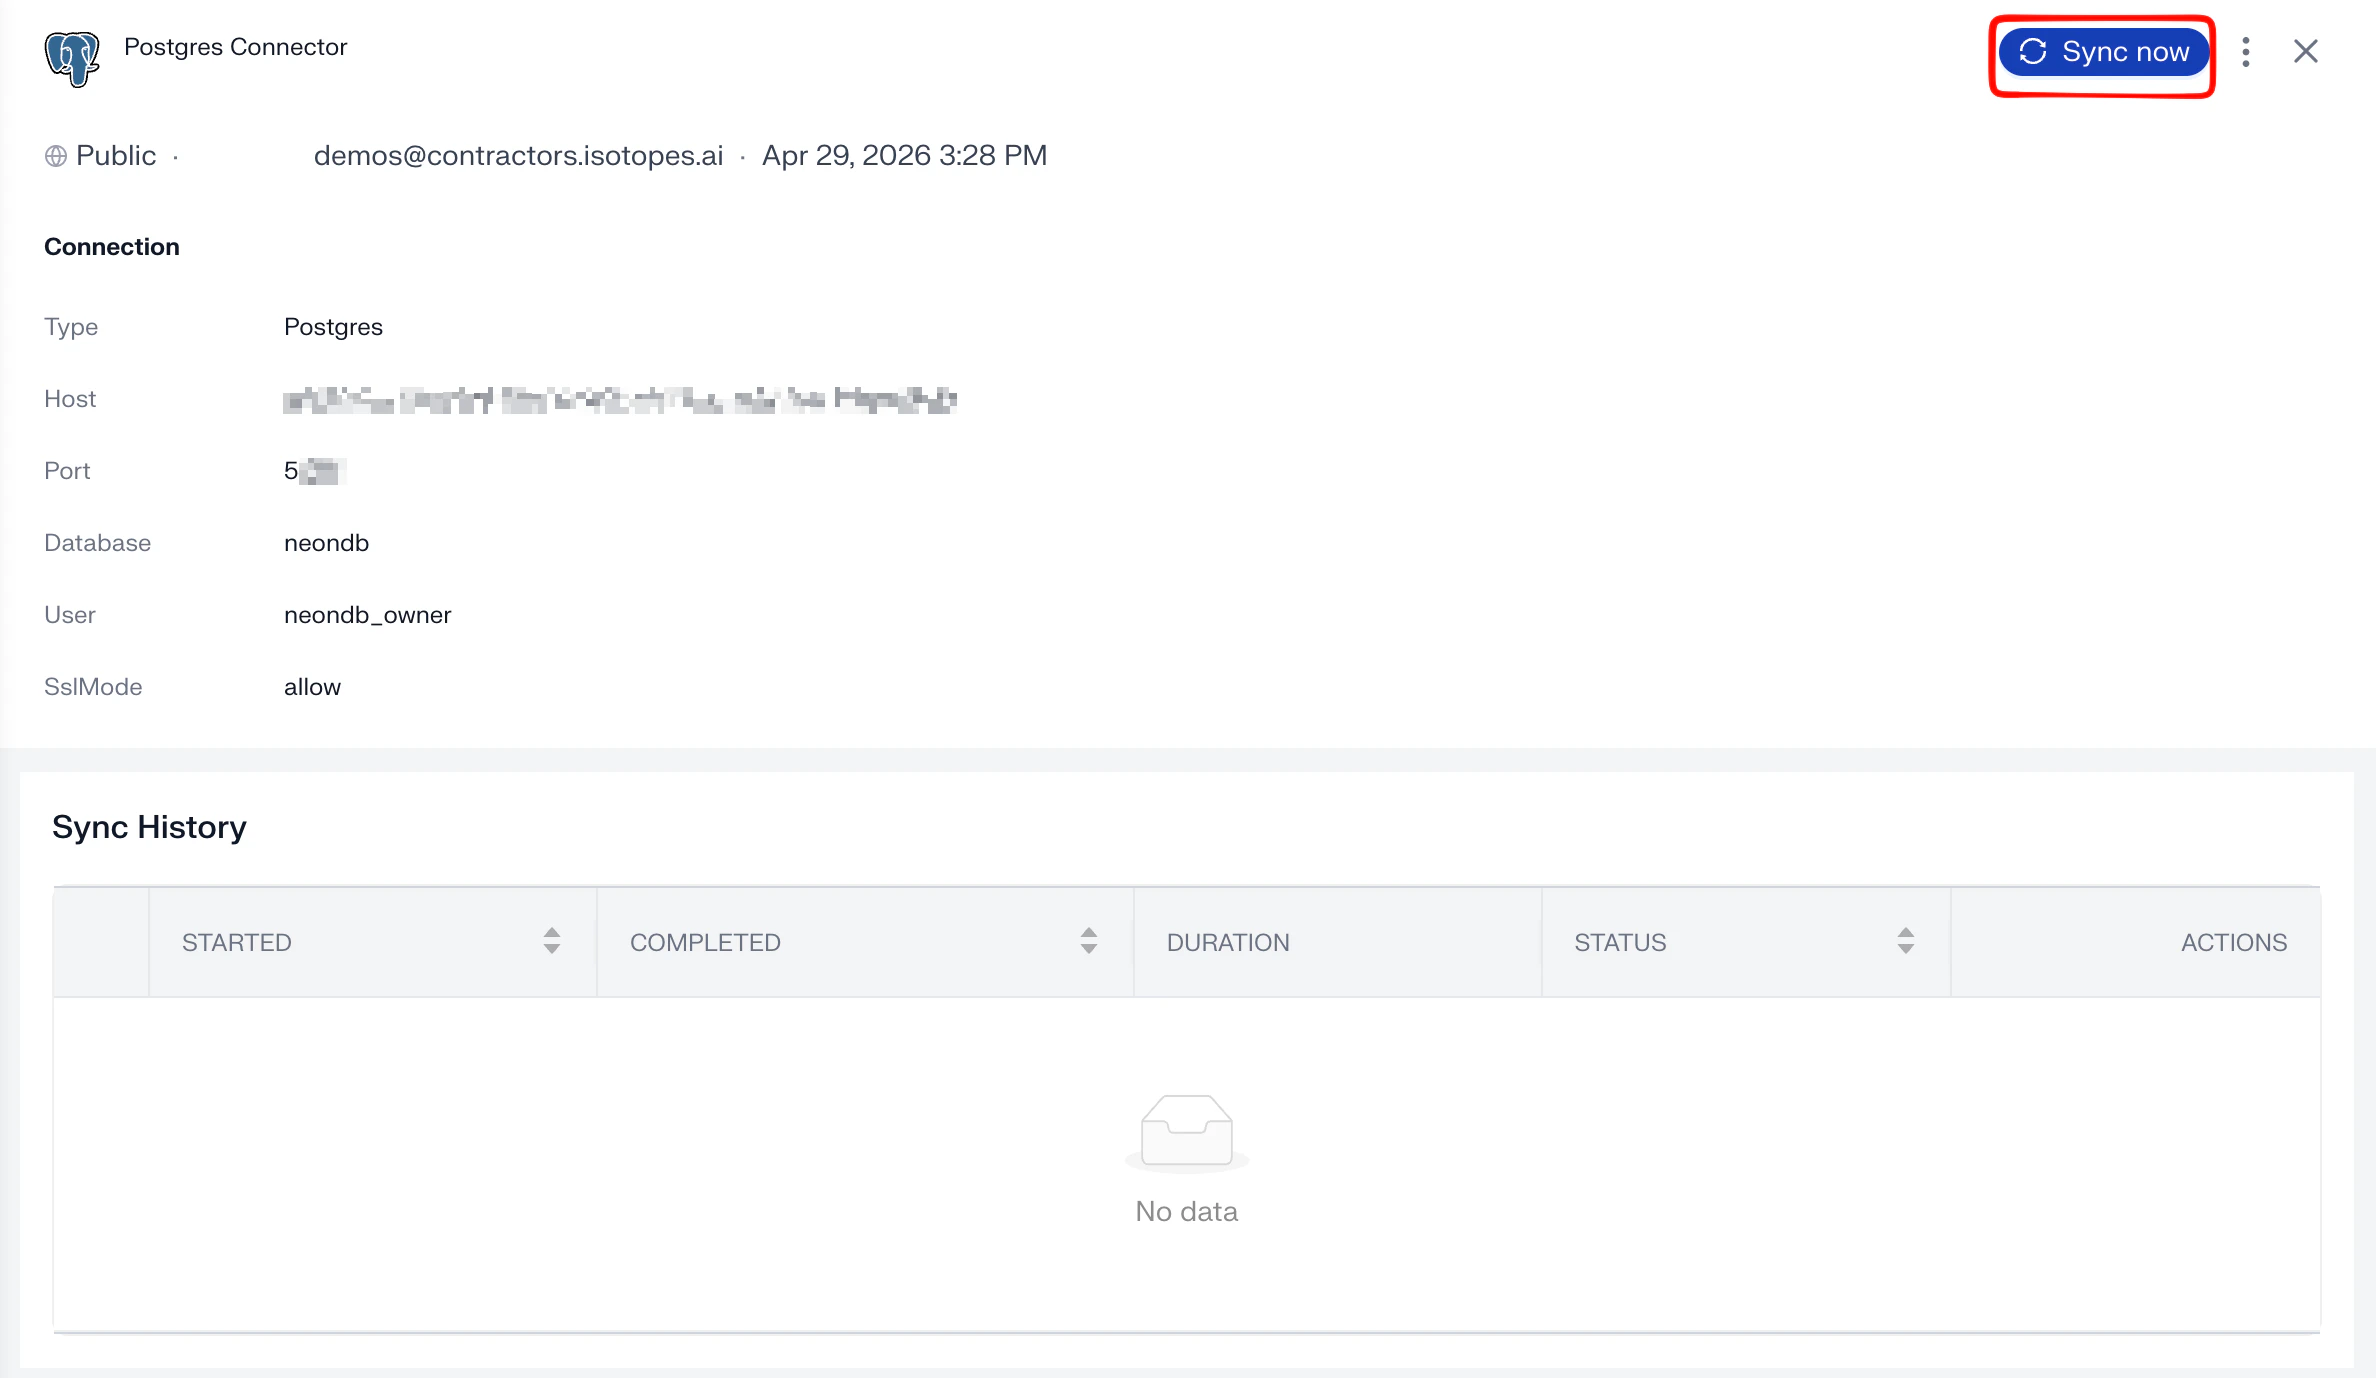
A new Postgres connector starts with no synced data the Sync History on the detail page is empty. Syncing tells aidnn which schemas to pull metadata from so notebooks can query them.
### Create the connector
Once the test passes, click **Create** at the bottom of the form. aidnn saves the connector and takes you to its detail page.
## 4. Sync metadata
A new Postgres connector starts with no synced data the Sync History on the detail page is empty. Syncing tells aidnn which schemas to pull metadata from so notebooks can query them.
 ### Step 1 - Click Sync now
Click **Sync now** in the top-right of the detail page.
### Step 2 - Pick the schemas to sync
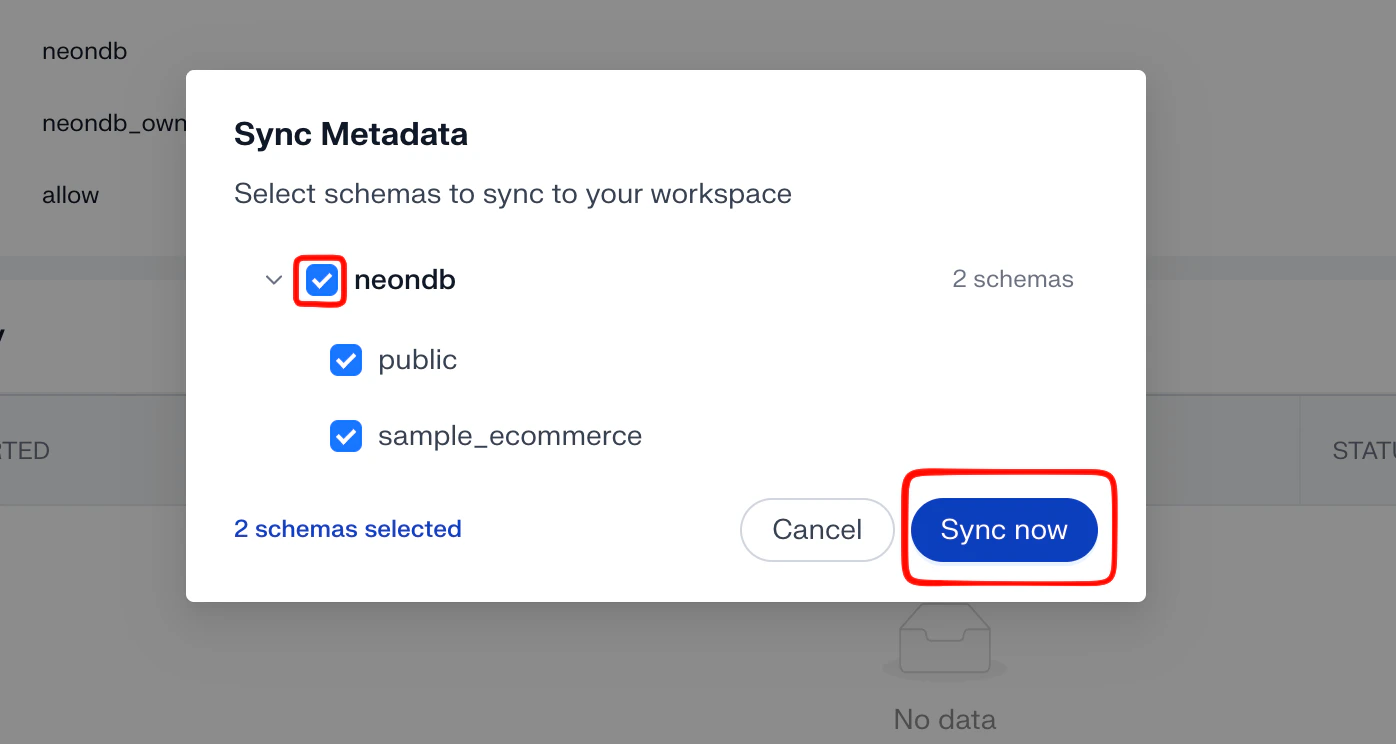
A **Sync Metadata** modal lists the databases and schemas aidnn discovered. Check the schemas you want to make available (you can pick all or just a subset, for example only *public* and *sample\_ecommerce*), then click **Sync now**.
### Step 1 - Click Sync now
Click **Sync now** in the top-right of the detail page.
### Step 2 - Pick the schemas to sync
A **Sync Metadata** modal lists the databases and schemas aidnn discovered. Check the schemas you want to make available (you can pick all or just a subset, for example only *public* and *sample\_ecommerce*), then click **Sync now**.
 ### Step 3 - The sync run
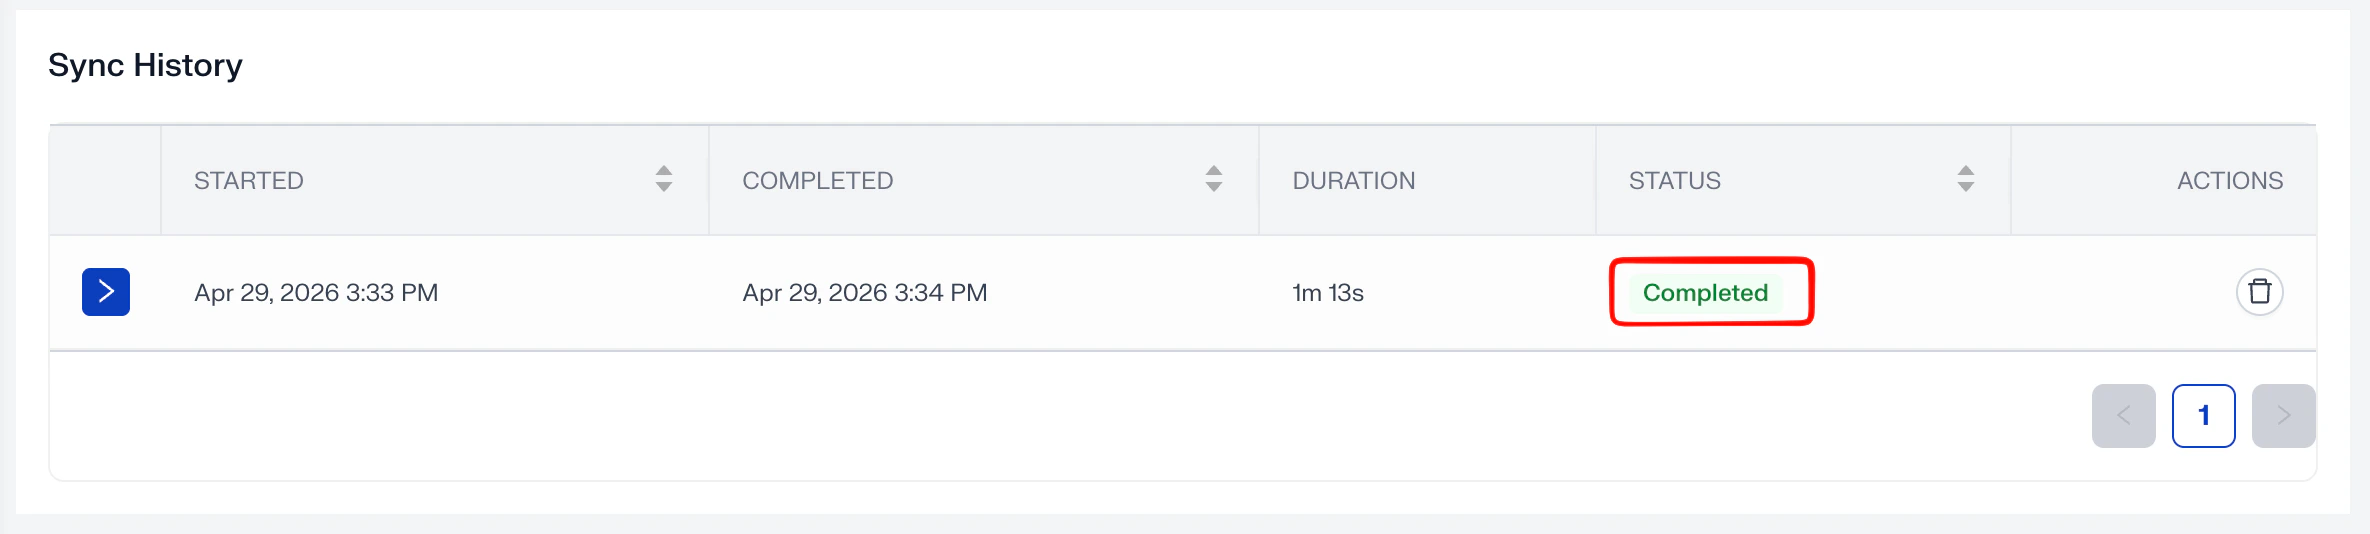
The Sync History row shows the run start and a Processing badge while metadata is being pulled in.
### Step 3 - The sync run
The Sync History row shows the run start and a Processing badge while metadata is being pulled in.
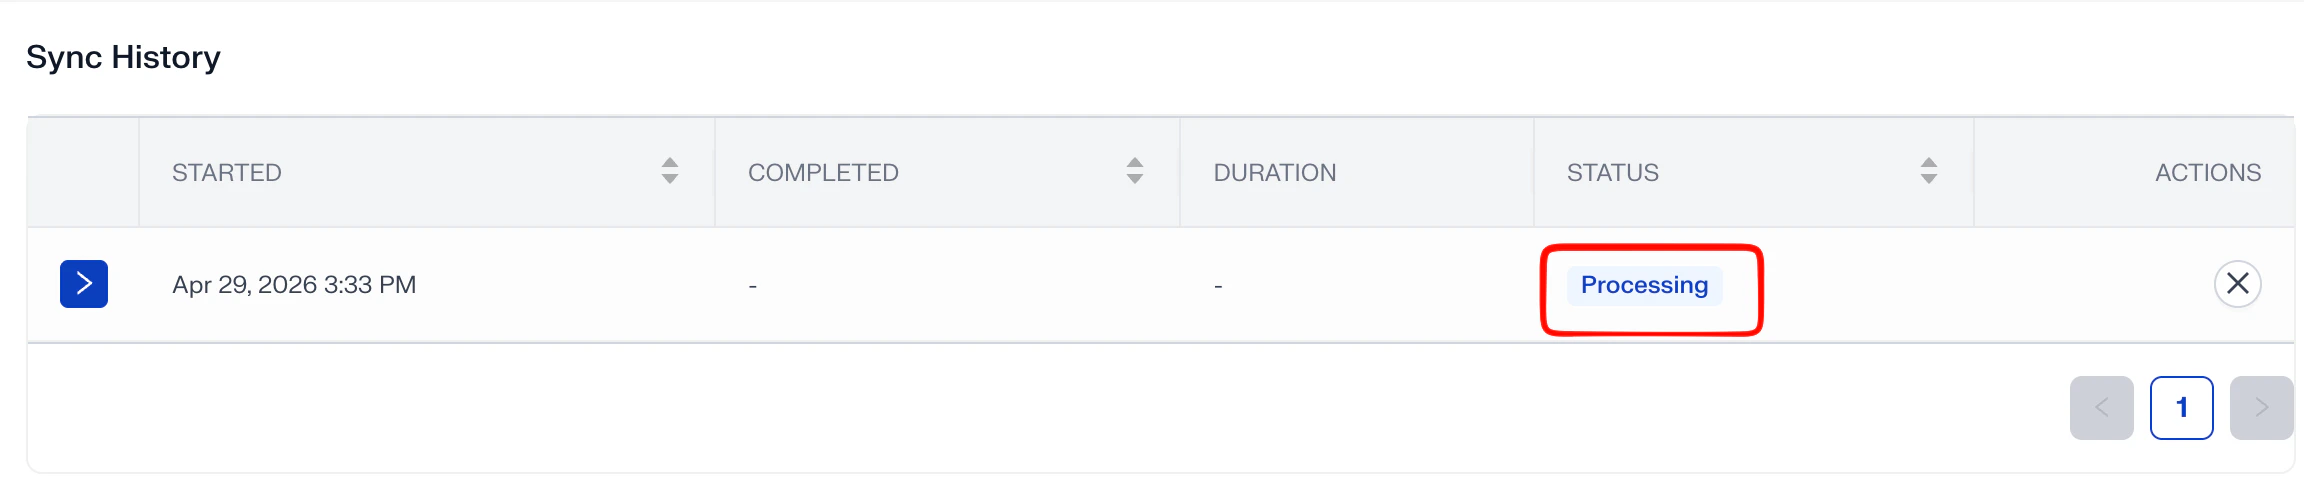 When it finishes, the badge flips to Completed and the duration is filled in.
 ## 5. You're done
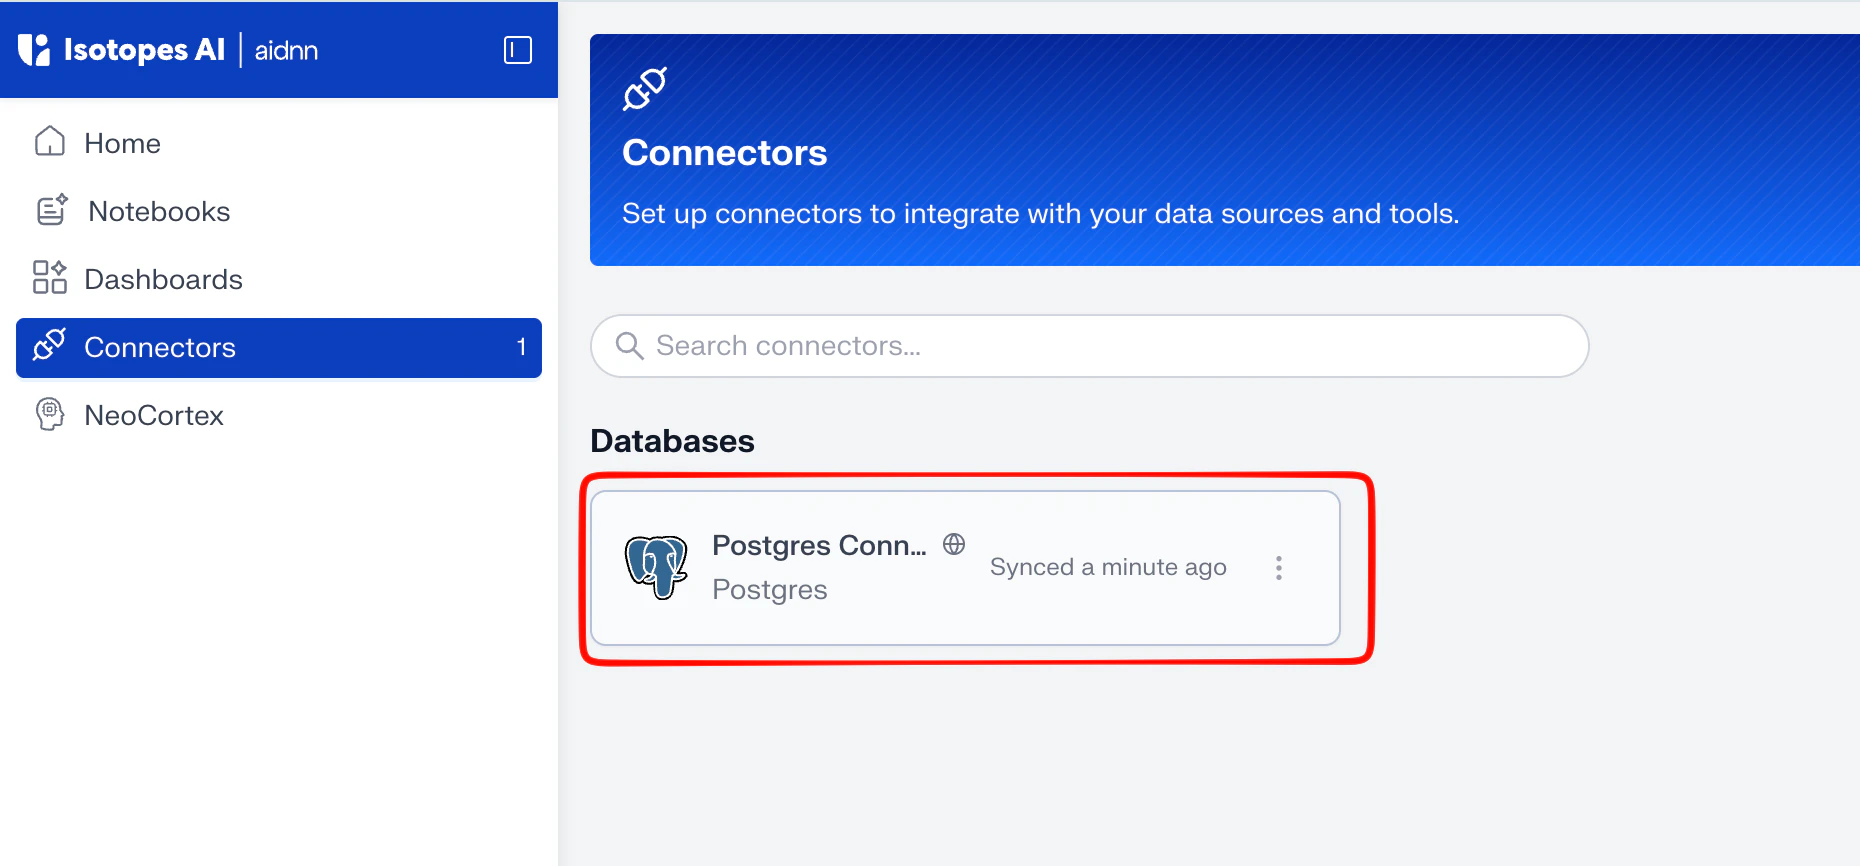
The Postgres connector is now active and synced. It appears under **Databases** on the Connectors page with the latest sync time. Notebooks can now query the synced schemas the same way they would any other connected source.
## 5. You're done
The Postgres connector is now active and synced. It appears under **Databases** on the Connectors page with the latest sync time. Notebooks can now query the synced schemas the same way they would any other connected source.