Overview
Connecting Snowflake to aidnn lets you analyze warehouse data live alongside the rest of your sources. Setup runs in two parts: first your Snowflake admin provisions a dedicated read-only role, service user and Personal Access Token (PAT) in Snowflake, then you enter those credentials in aidnn and pick which databases to sync.1. Prerequisites - Snowflake admin setup
This section runs entirely in Snowflake. It uses a fictitious organization “AcmeCorp” with database ACMECORP_PROD and warehouse ANALYSIS_WH substitute your own names. You’ll need a Snowflake role with permissions to create roles, users, grants, and PATs (typically ACCOUNTADMIN or an equivalent admin role).Create the read-only role and grant database access
Create a dedicated read-only role and grant USAGE/SELECT on existing and future objects in the database, so the role keeps working as the schema evolves.Create the service user
Create a service account user that aidnn will authenticate as.Grant the role to the user and grant warehouse access
Assign the read-only role to the service user, and grant USAGE on the warehouse the role will run queries against.Create the Personal Access Token (PAT)
aidnn authenticates with a PAT scoped to AIDNN_SERVICE_USER and AIDNN_READONLY_ROLE. You can create it through the Snowflake UI or with SQL:2. Add the Snowflake connector in aidnn
Open the Connectors page
From the aidnn home screen, click Connectors in the left sidebar.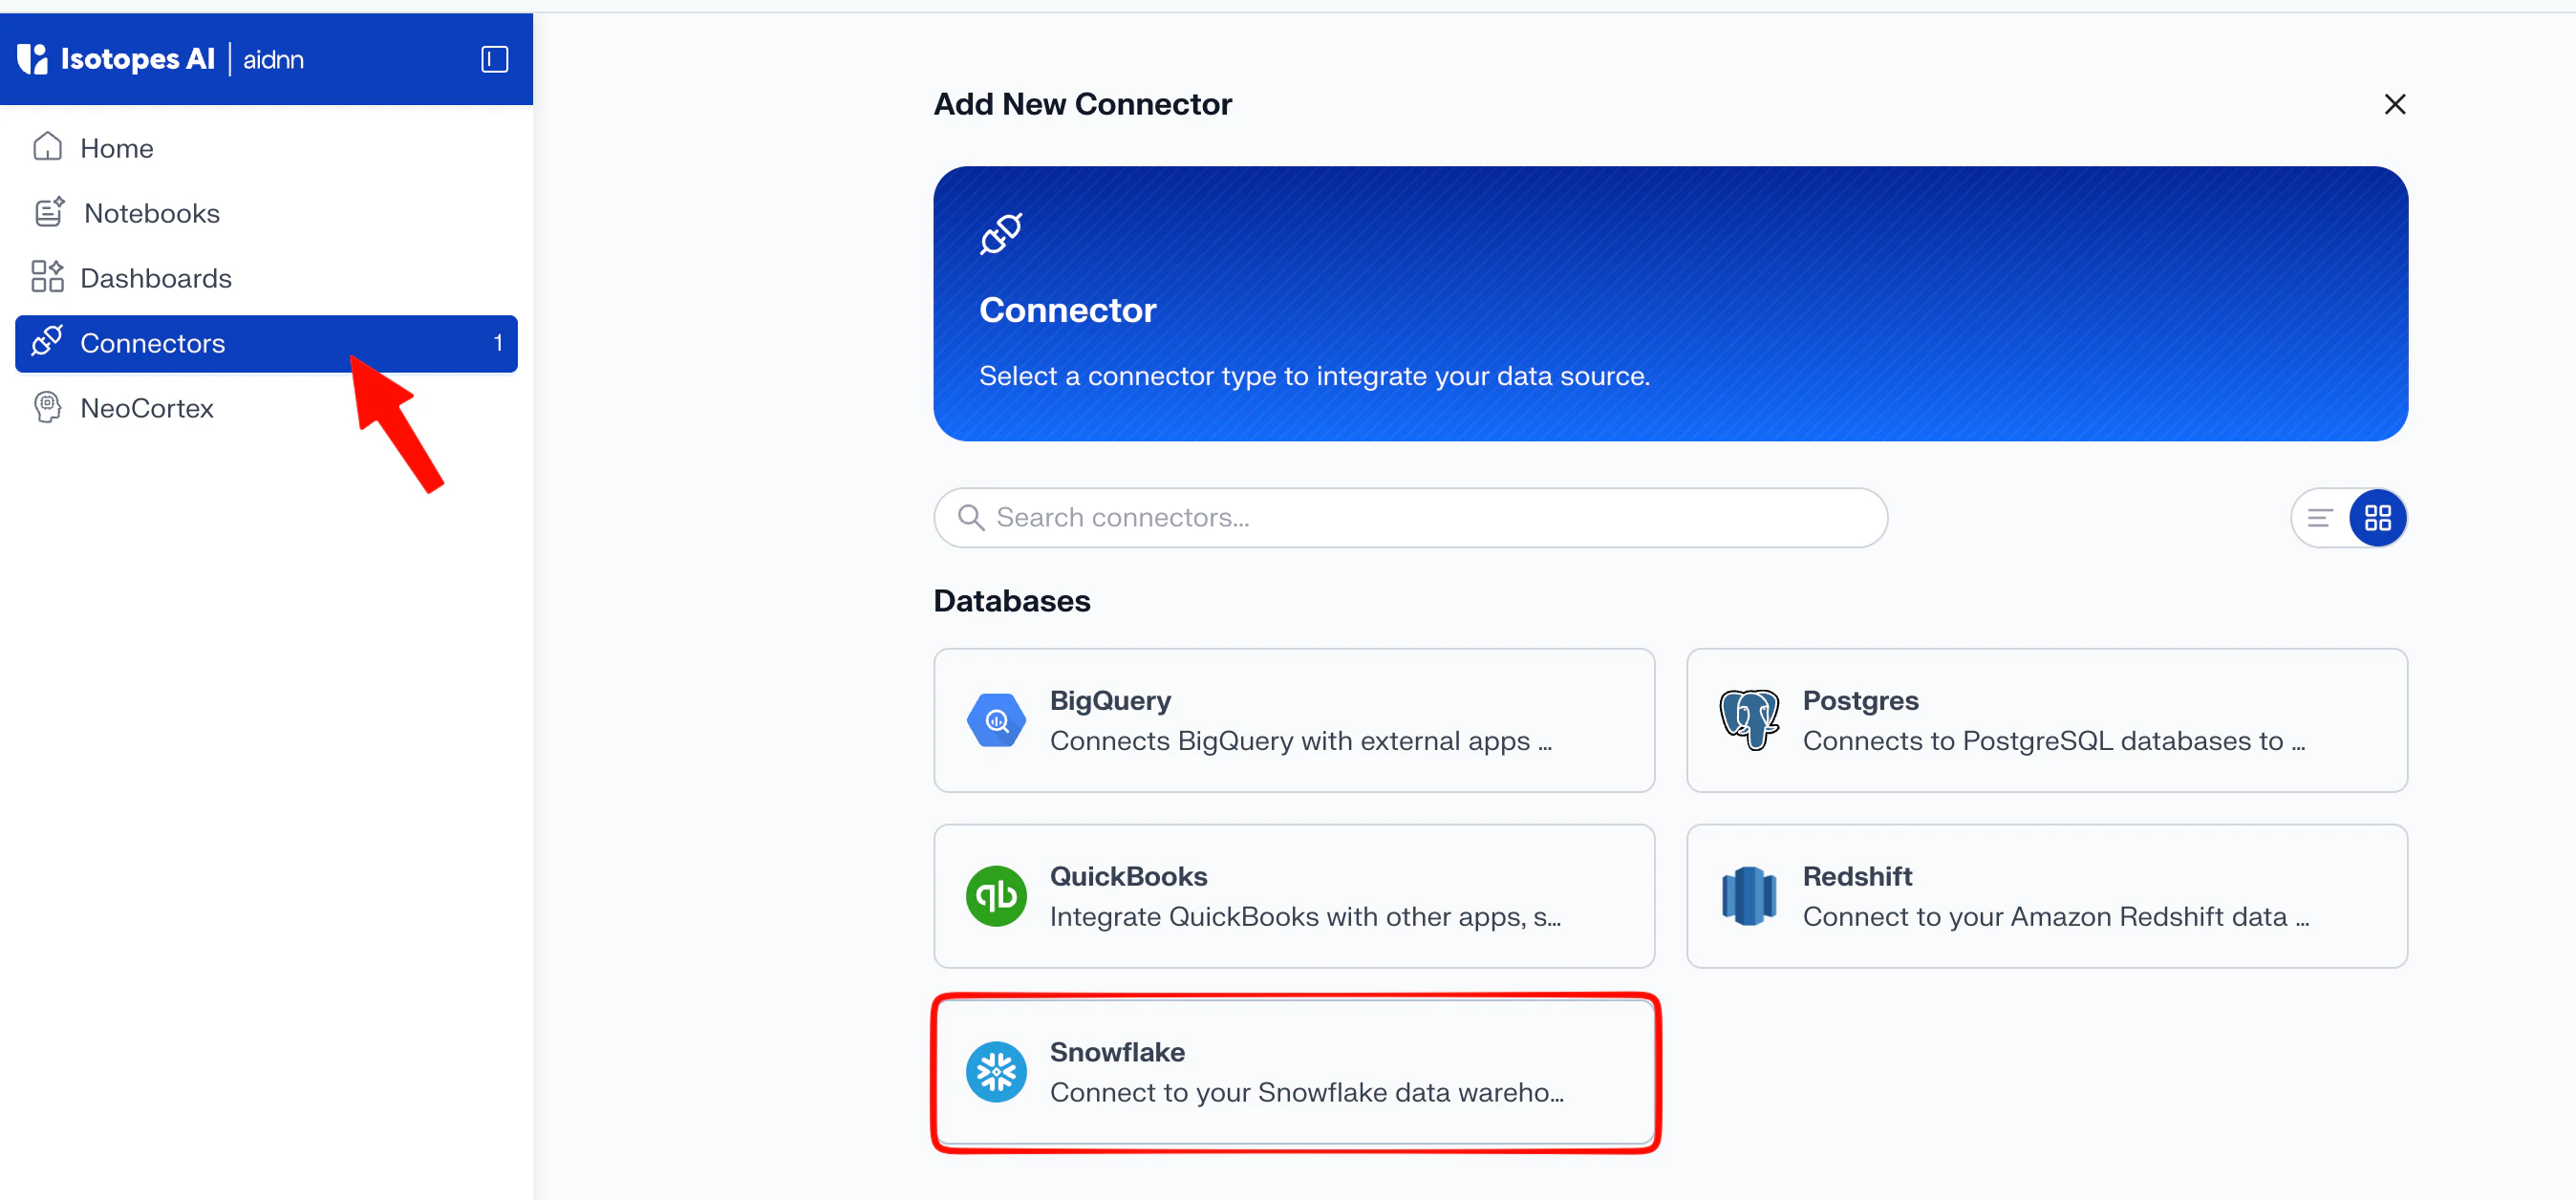
Start a new connector
Click Add New Connector in the top-right corner. You’ll see a grid of every available connector grouped by category.Pick Snowflake
Under Databases, choose Snowflake. This opens the Add New Snowflake Service page.3. Fill in the connector details
The Add New Snowflake Service form has two parts: identification (name, description) and credential configuration.General fields
- Name - Any descriptive name, this is what shows up as the connector name once setup is complete (for example, “Snowflake – ACMECORP_PROD”).
- Description - Useful when you connect more than one Snowflake account or warehouse.
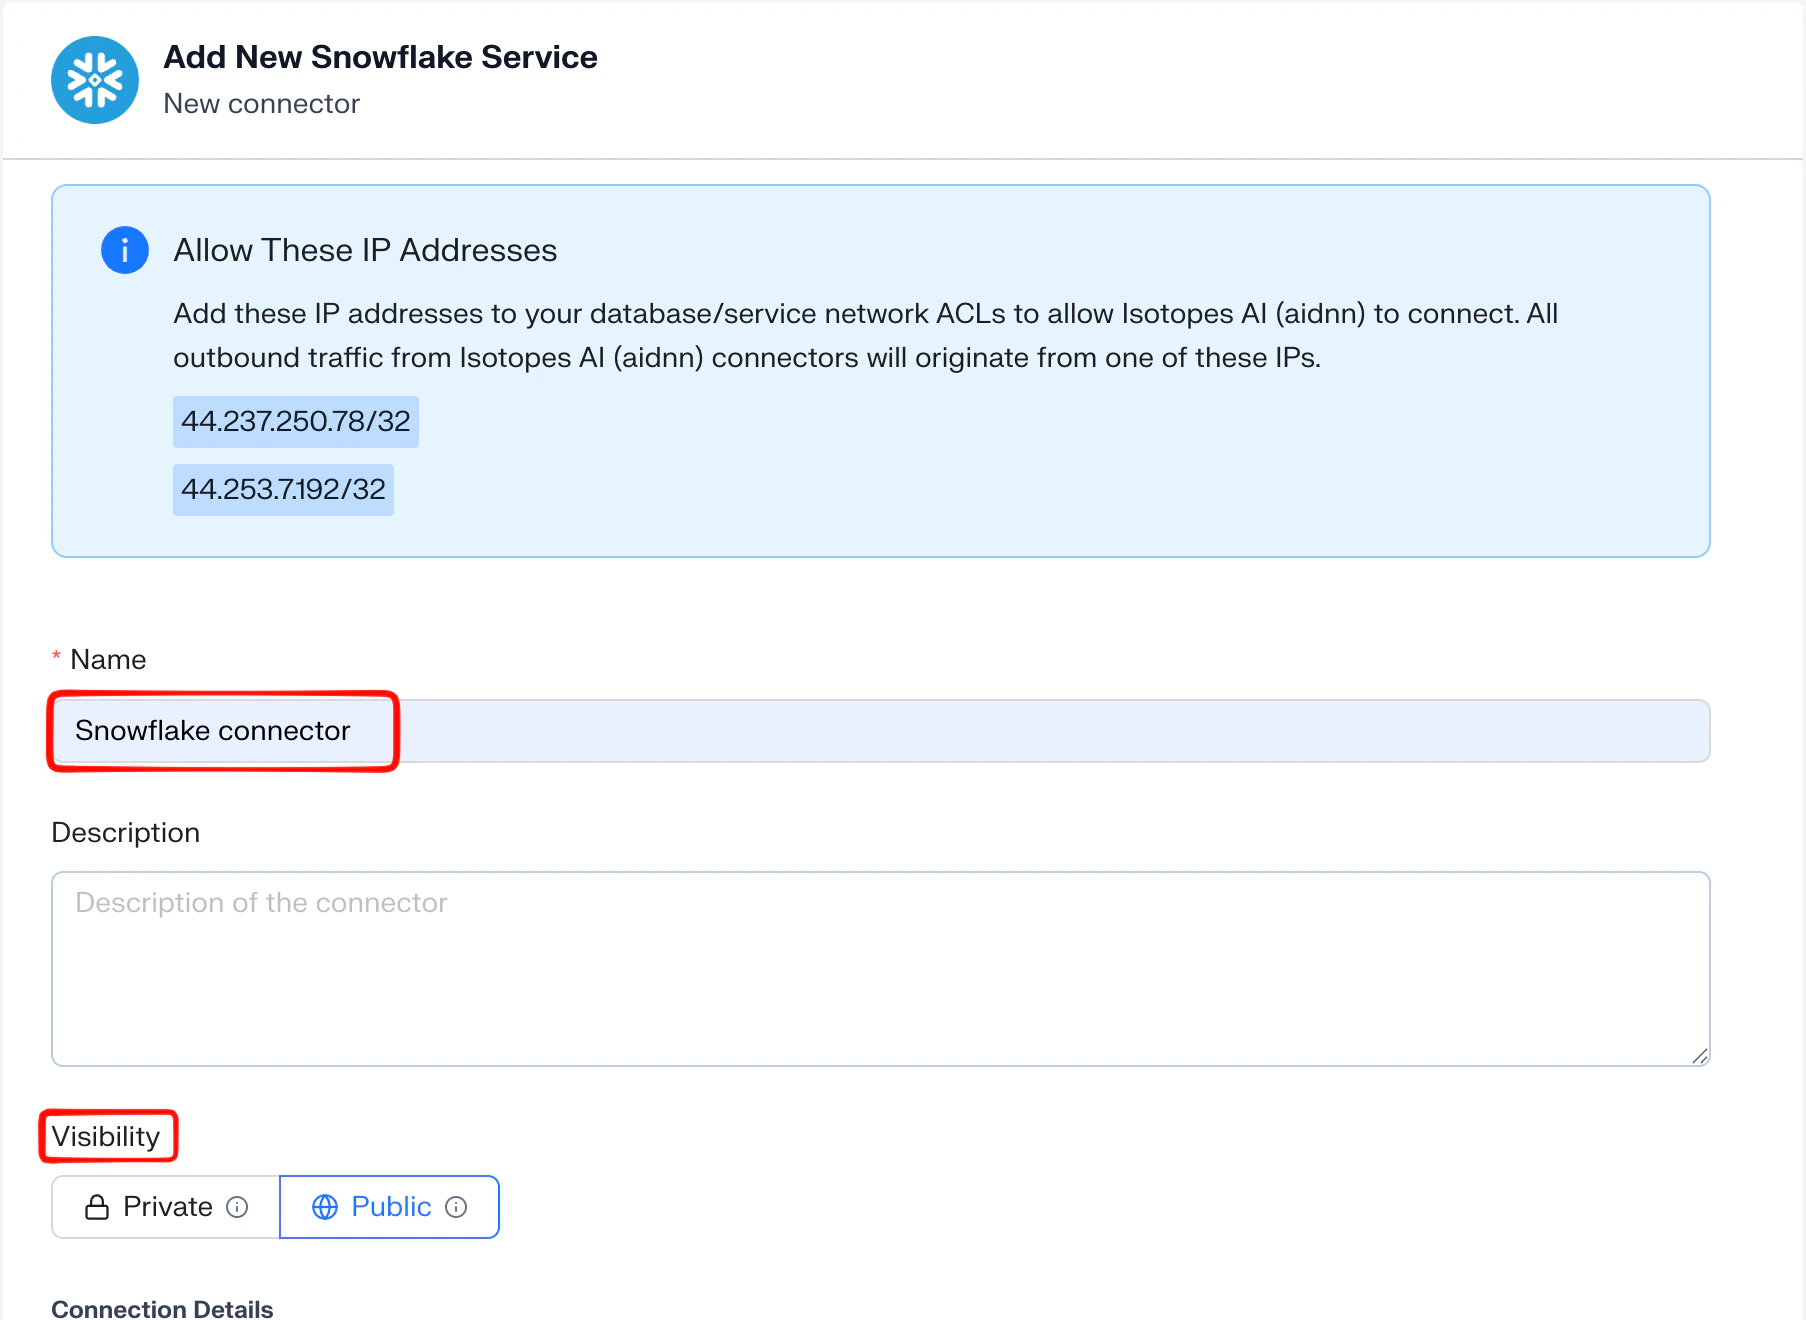
Credential configuration
- Username - the Snowflake user aidnn authenticates as (the AIDNN_SERVICE_USER you created in section 1).
- Account - your Snowflake account identifier (for example, xy12345.us-east-1). This identifies the Snowflake account aidnn connects to.
- Warehouse - the virtual warehouse aidnn runs queries against (for example, ANALYSIS_WH).
- Password - paste the Personal Access Token (PAT) here, not the user’s Snowflake login password.
- Advanced Configuration Options - optional, typically not needed unless your username and PAT are scoped to a specific role or default database. If they are, ask your Snowflake admin for those values.
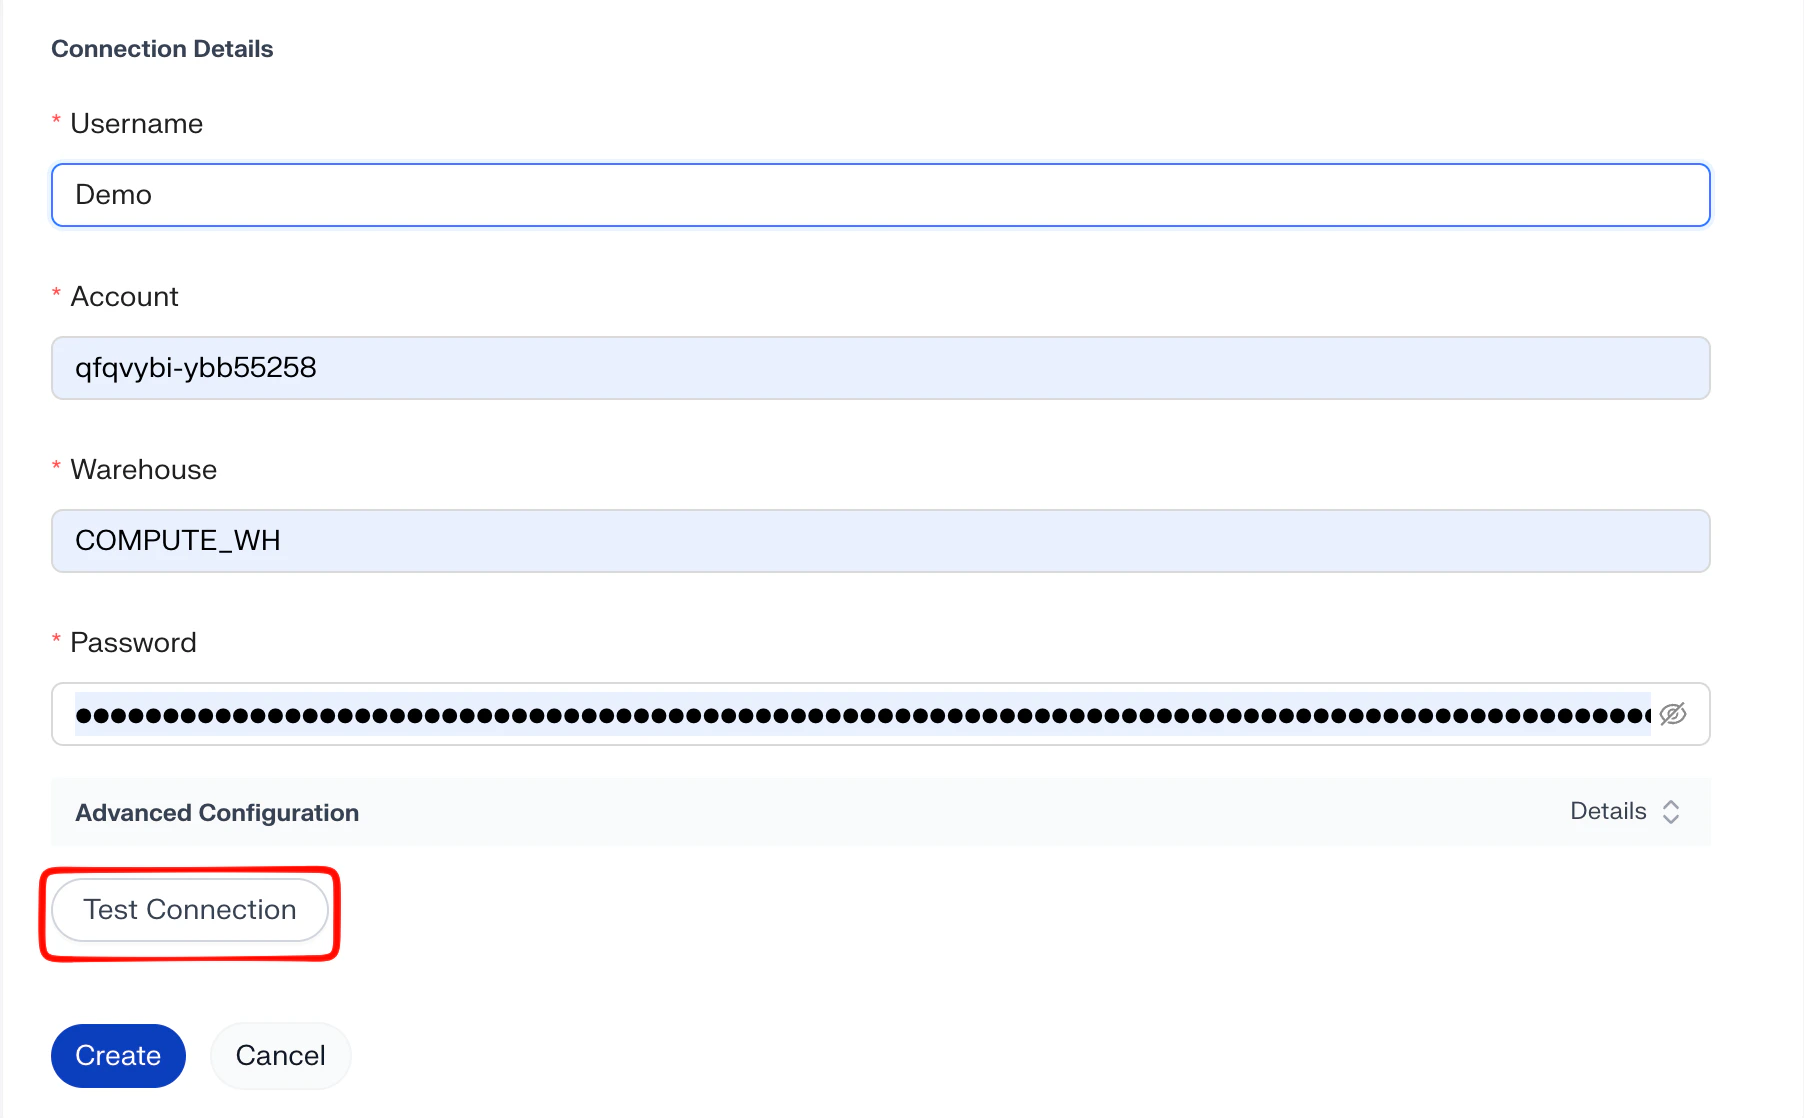
4. Test the connection
Click Test Connector to verify aidnn can authenticate and reach Snowflake. The test runs four checks:- Account validity — the account identifier resolves to a reachable Snowflake account.
- User credentials — the username and PAT authenticate successfully.
- Warehouse access — the role can use the named warehouse.
- Required permissions — the role can list databases and read schemas/tables/views.

5. Create the connector and sync
Step 1 - Click Add
Once the test passes, click Create to create the connector. aidnn saves it and takes you to the connector detail page, which shows the configuration you entered.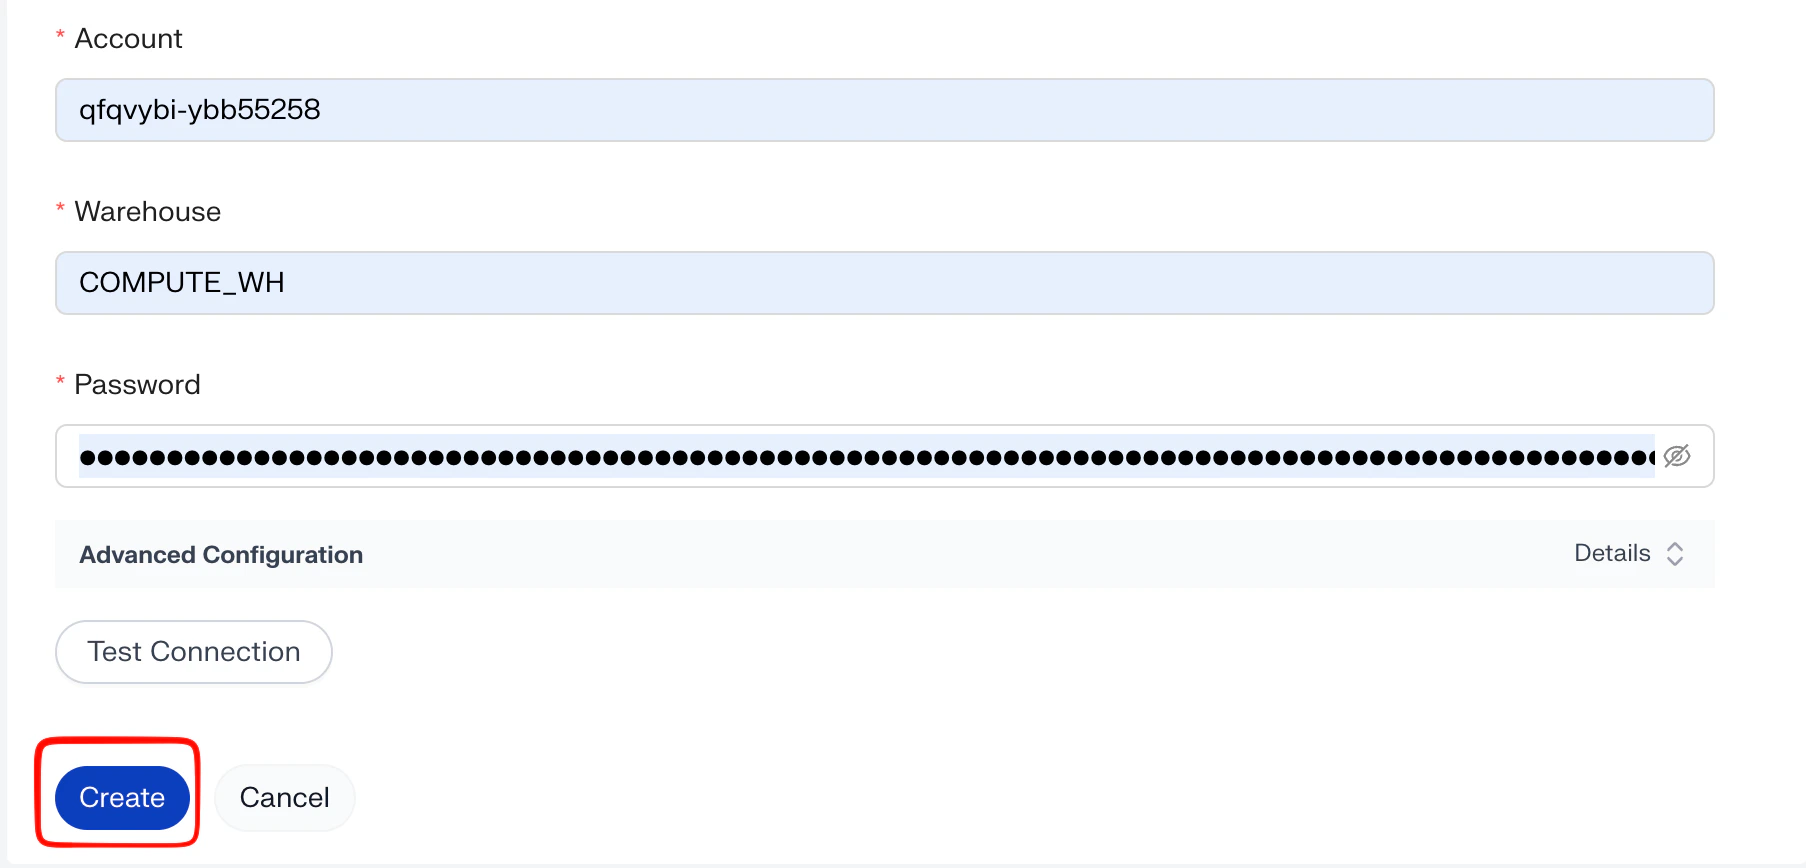
Step 2 - Click Sync now
On the detail page, click Sync now to start syncing metadata.
Step 3 - Pick the database to sync
In the Sync Metadata panel, select the database (or databases) you want to make available through this connector. This determines which schemas, tables, and views aidnn pulls metadata for.Click Sync now in the bottom-left of the panel to kick off the sync.

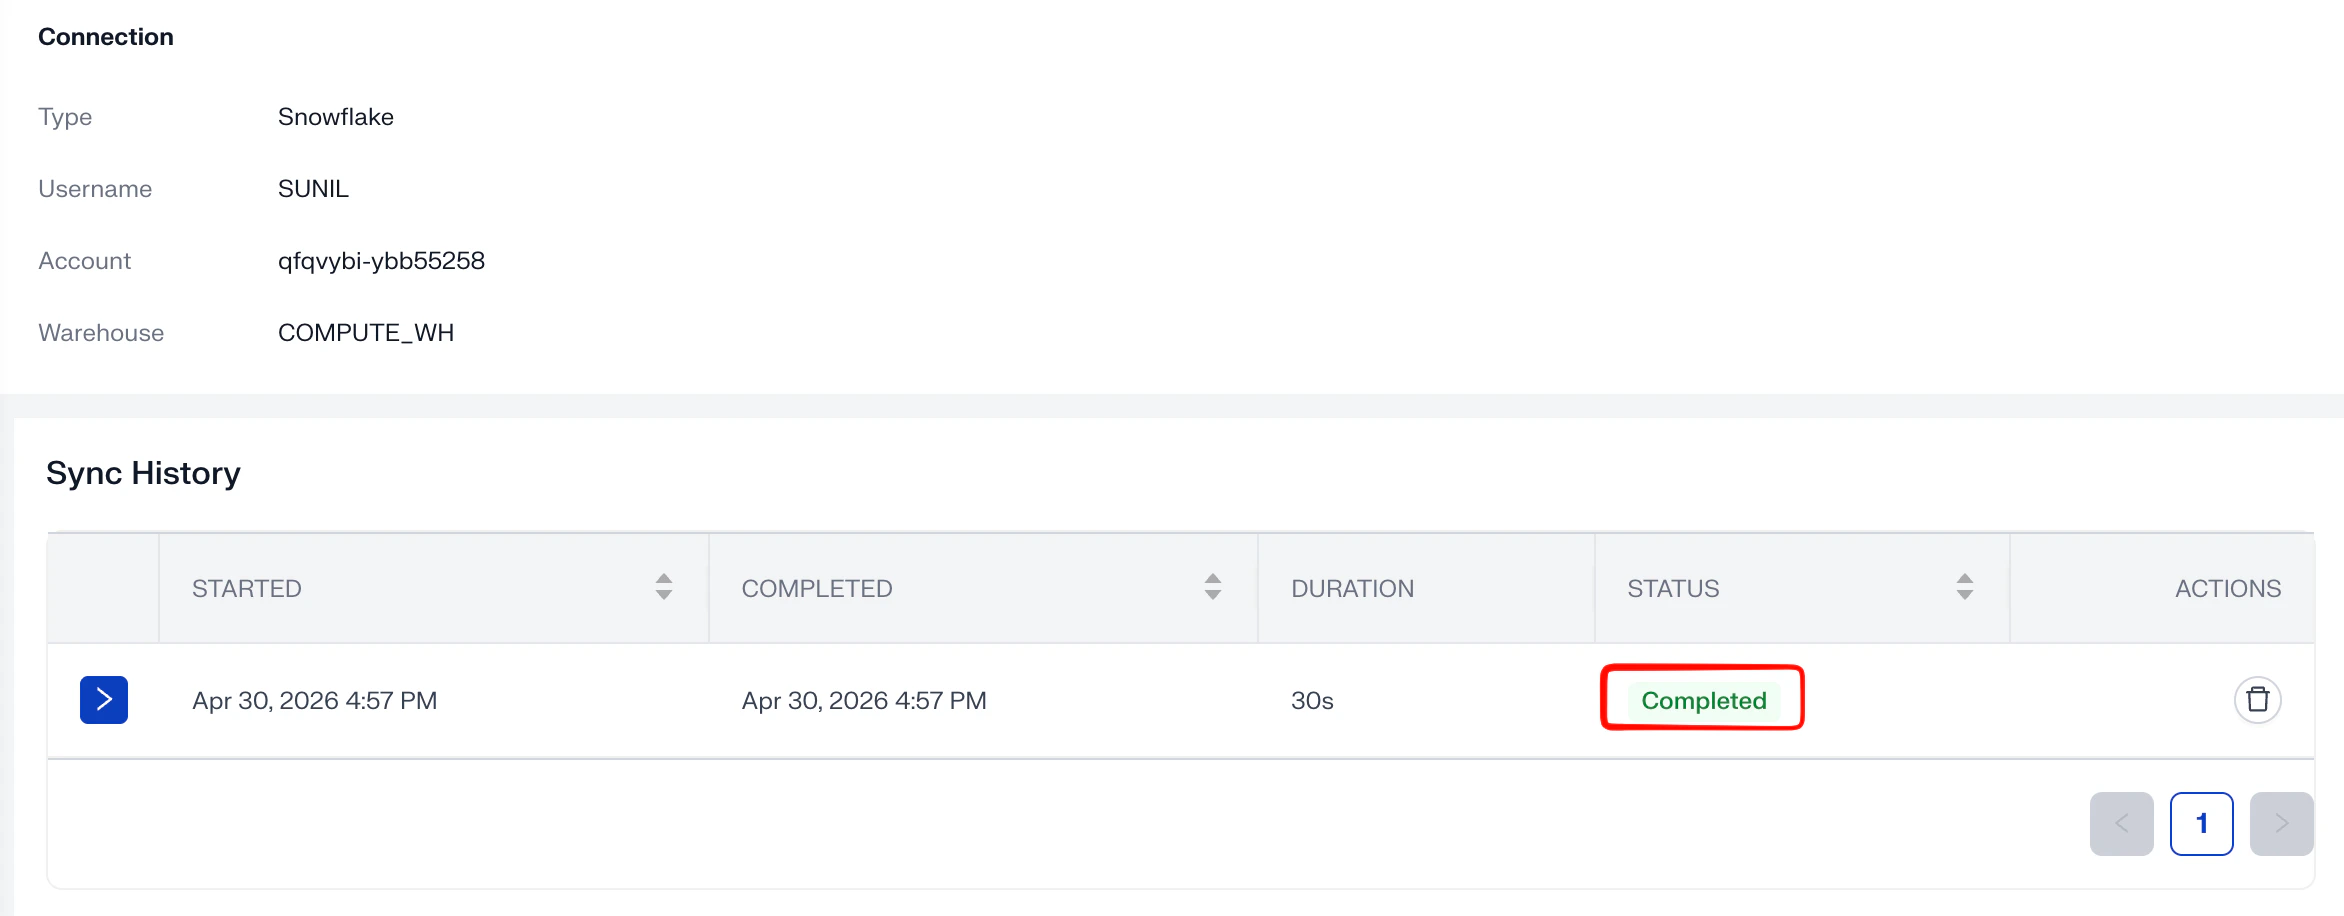
Step 4 - Watch the workflow
Once the sync starts:- The run enters the workflow state and shows current progress.
- You can monitor each step as it runs.
- When it finishes, the status flips to Completed and the connector is ready to use.